Elastic Volume Service ABS
Product Advantages
Block Storage (ABS) is a low-latency, high-performance, durable, and highly reliable distributed block storage solution. It can serve as scalable storage for cloud servers and elastic container services, ensuring data security.
Product Advantages
Ultimate disk performance, high-reliability design, diverse management methods, and elastic scaling capabilities to meet various business requirements.
1.Data Durability
- Disks utilize a multi-replica mechanism with multiple redundancy layers to eliminate single points of failure, providing 99.9999999% reliability to ensure data safety and security.
2.Dynamic Scaling
- A single disk supports up to 32TB capacity, with both capacity and performance elastically scalable to accommodate growing business needs.
3.Comprehensive Management
- Offers multiple management methods including Console and OpenAPI, enabling easy use and management of disks with simple operations, effectively reducing manual costs.
Product Features
1.Rich Storage Types
- Disks use NVMe SSD storage media and provide various disk specifications tailored to different business scenarios.
2.Enterprise-Grade Block Storage Features - Distributed multi-replica mechanism delivers stable and efficient data access capabilities, preventing data loss caused by single points of failure.
3.Ultimate Performance - Provides up to 400MB/s throughput per disk with microsecond latency.
Product Specifications
| Specification | SSDDisk | Efficient Disk |
|---|---|---|
| Single Disk Capacity Range(GB) | 20~32,768 | 20~32,768 |
| Single Disk IOPS Performance Formula | min{1,800+30*apacity, 6,000} max 6000 | min{1,800+8*apacity, 5,000} max 5000 |
| Single Disk Throughput Performance Formula (MB/s) | min{120+0.5*apacity, 400} max 400MB/s | min{100+0.15*apacity, 180}max 180MB/s |
| Average Random Write Latency(ms) block 4K | 0.5~2 | 1~3 |
Application Scenarios
1.Database Applications
ABS uses NVMe standard SSD hardware with high performance and low latency, fully meeting the high-performance storage requirements of databases.
- Up to 400MB/s throughput per disk with microsecond latency.
- Maximum single disk capacity of 32TB
2.Development and Testing Scenarios
ABS offers multiple redundancy mechanisms, elastic scaling, and high cost-effectiveness, ensuring stable, reliable, and high-quality storage for development and testing environments.
- Data reliability of 9 nines.
- Performance scales linearly with capacity.
- Maximum single disk capacity of 32TB
3.Data Protection
Critical business operations running on instances require data recovery in case of accidental deletion or malicious tampering.
-Create different snapshot policies based on actual business protection needs. When disk errors occur, perform second-level rollback using the snapshot feature.
Billing Overview
1.Billing Methods
Subscription: A pay-before-you-use billing method. With subscription, you can reserve resources in advance and enjoy greater price discounts. Pay-As-You-Go: A pay-after-you-use billing method.
| Billing Item | Measurement Method | Billing Calculation |
|---|---|---|
| Disk Capacity | Capacity specification and purchase duration | Subscription: Disk Capacity (GiB) × Unit Price of Disk × Purchase Duration. Pay-As-You-Go: Disk Capacity (GiB) × Unit Price of Disk × Billing Duration |
2.Usage Rules
- Billing starts immediately after the disk is created, regardless of whether it is attached or not.
3.Expiration Reminder
- Users will be notified via internal message 5 days, 3 days, and 1 day before subscription service expiration.
4.Overdue Processing
- Resources become read-only within 24 hours after expiration; data is retained but cannot be read for 14 days after expiration; data is automatically destroyed and unrecoverable 15 days after expiration.
Quick Start
This section describes how to quickly get started with EBS, including creating a disk, attaching it, and partitioning and formatting.
Step 1: Create a Disk
1.Log in to the Cloud Service Console(https://console.sensecore.cn )

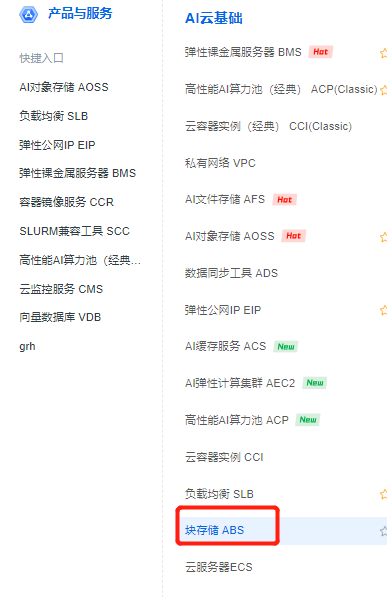
2.Click "Block Storage EBS" in the left navigation bar to enter the Disk Console.
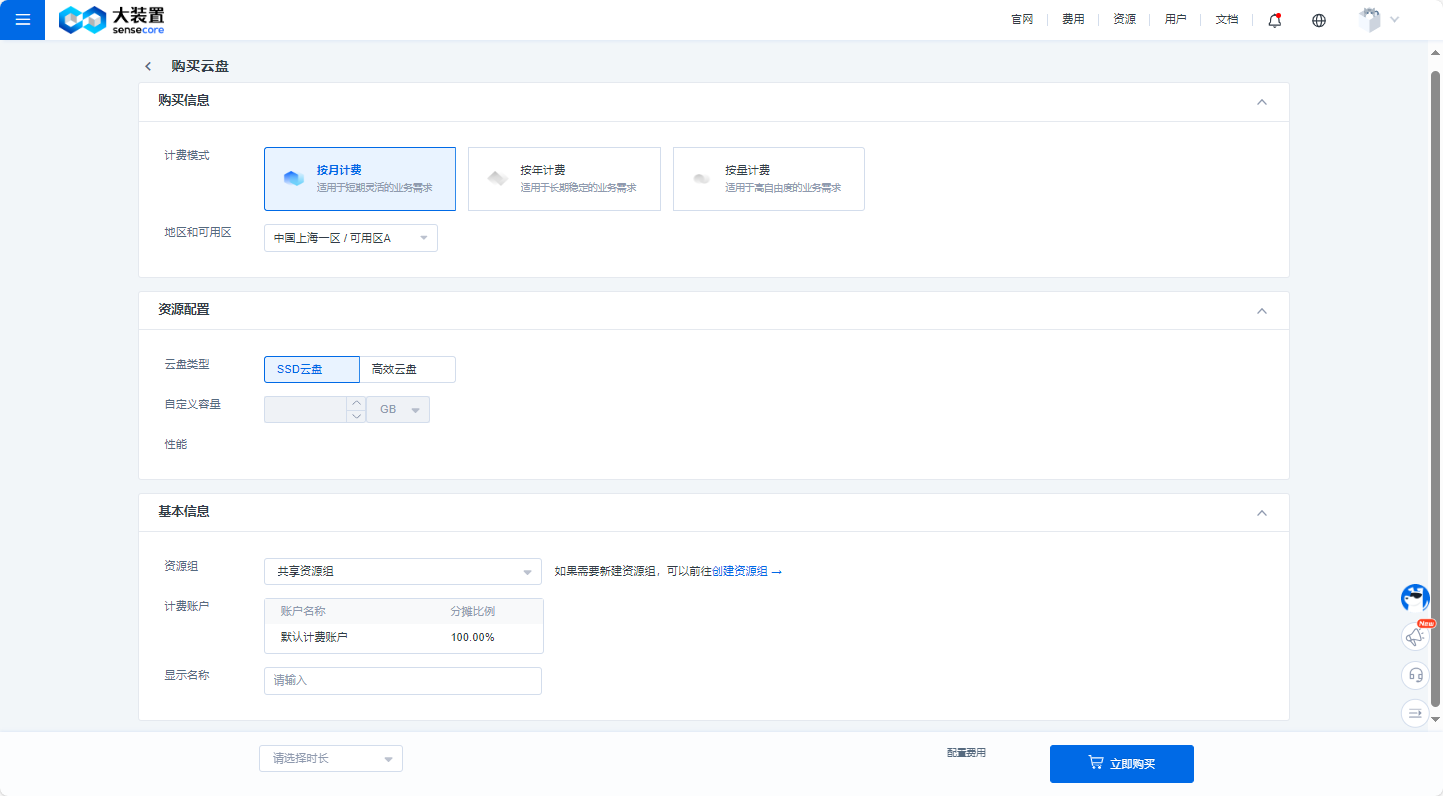
3.Click the "Create Disk" button to go to the purchase page, select the disk type, specify the capacity (range: 20-32768GB) and display name (supports Chinese characters, English letters, numbers, and underscores "_", 1-63 characters, must start with Chinese/English letters or numbers)
4.Confirm the information is correct and click "Buy Now".
Step 2: Attach a Disk
1.Open the Disk Console.
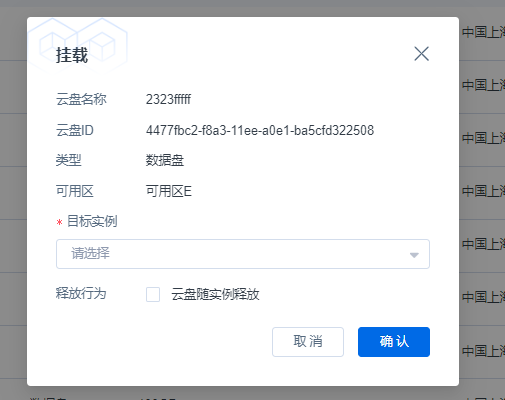
2.On the Disk List page, select the target disk and click "Attach" in the operation column.

3.In the attachment dialog, select the target instance and click "Confirm". The disk will be attached successfully.
Step 3: Partition and Format
Using a Linux operating system as an example, after attaching a new disk to a cloud server, partition and format the disk. The partition table is set to MBR by default.
1.Log in to the Linux instance.
2.Run the following command to view the newly added data disk information.
fdisk -l
In the output disk information, it shows that the current cloud server has two disks: /dev/sda is the system disk, and /dev/sdc is the newly added data disk.
3.Run the fdisk command to begin partitioning the data disk.
Taking the newly attached /dev/sdc as an example:
fdisk /dev/sdc
The output is as follows:
[root@XXX ~]# fdisk /dev/sdc
Welcome to fdisk (util-linux 2.23.2).

Changes will remain in memory only, until you decide to write them.
Be careful before using the write command.

Device does not contain a recognized partition table
Building a new DOS disklabel with disk identifier 0xff816a4b.

Command (m for help):
4.Enter n and press "Enter" to create a new partition.
Command (m for help): n
Partition type:
p   primary (0 primary, 0 extended, 4 free)
e   extended
This indicates two partition types:
"p" represents a primary partition.
"e" represents an extended partition.
Note:
When using the MBR partition table format, you can create up to 4 primary partitions, or 3 primary partitions plus 1 extended partition. Extended partitions cannot be used directly and must be divided into logical partitions.
When using the GPT partition table format, there are no distinctions between primary, extended, or logical partitions.
5.To create a primary partition, enter p and press "Enter".
Select (default p): p
Partition number (1-4, default 1):
6.To select partition number 1, enter 1 and press "Enter".
Partition number (1-4, default 1): 1
First sector (2048-41943039, default 2048):
7.Press "Enter" to use the default first sector value. The system will automatically suggest the first and last sector values. You can customize them or use the defaults. The first sector must be less than the last sector.
First sector (2048-41943039, default 2048): 2050
Last sector, +sectors or +size{K,M,G} (2050-41943039, default 41943039):
"Last sector" indicates the ending sector value. You can choose a value between 2050 and 41943039, defaulting to 41943039.
8.Press "Enter" to use the default last sector value.
Last sector, +sectors or +size{K,M,G} (2050-41943039, default 41943039):
Using default value 41943039
Partition 1 of type Linux and of size 20 GiB is set

Command (m for help):
This indicates that the partition is complete; one new partition has been created for the data disk.
9.Enter p and press "Enter" to view details of the newly created partition.
Disk /dev/sdc: 21.5 GB, 21474836480 bytes, 41943040 sectors
Units = sectors of 1 * 512 = 512 bytes
Sector size (logical/physical): 512 bytes / 512 bytes
I/O size (minimum/optimal): 512 bytes / 512 bytes
Disk label type: dos
Disk identifier: 0xff816a4b

    Device Boot      Start         End      Blocks   Id  System
/dev/sdc1            2050    41943039    20970495   83  Linux

Command (m for help):
This shows detailed information about the new partition /dev/sdc1.
10.Enter w and press "Enter" to write the partition result to the partition table.
Command (m for help): w
The partition table has been altered!

Calling ioctl() to re-read partition table.
Syncing disks.
Note:
If there were errors during partitioning, enter q to exit the fdisk tool; the previous partition results will not be saved.
- Run the following command to synchronize the new partition table changes to the operating system.
partprobe
12.Run the following command to set the file system for the new partition to the required format.
mkfs -t <filesystem_format> /dev/sdc1
Taking the file system "ext4" as an example:
mkfs -t ext4 /dev/sdc1
mke2fs 1.42.9 (28-Dec-2013)
Filesystem label=
OS type: Linux
Block size=4096 (log=2)
Fragment size=4096 (log=2)
Stride=0 blocks, Stripe width=0 blocks
1310720 inodes, 5242623 blocks
262131 blocks (5.00%) reserved for the super user
First data block=0
Maximum filesystem blocks=2153775104
160 block groups
32768 blocks per group, 32768 fragments per group
8192 inodes per group
Superblock backups stored on blocks:
       32768, 98304, 163840, 229376, 294912, 819200, 884736, 1605632, 2654208,
       4096000

Allocating group tables: done
Writing inode tables: done
Creating journal (32768 blocks): done
Writing superblocks and filesystem accounting information: done
Formatting may take some time. Please monitor the system status and do not exit.
13.Run the mkdir command to create a mount directory.
mkdir /mnt/sdc
14.Run the mount command to mount the new partition to the directory created in step 13.
Taking mounting new partition /dev/sdc1 to /mnt/sdc as an example:
mount /dev/sdc1 /mnt/sdc
15.Run the df -TH command to check the mount result.
df -TH
 Filesystem     Type      Size  Used Avail Use% Mounted on
 /dev/sda1      ext4       43G  1.7G   39G   5% /
 devtmpfs       devtmpfs  4.1G     0  4.1G   0% /dev
 tmpfs          tmpfs     4.2G     0  4.2G   0% /dev/shm
 tmpfs          tmpfs     4.2G  9.1M  4.1G   1% /run
 tmpfs          tmpfs     4.2G     0  4.2G   0% /sys/fs/cgroup
 tmpfs          tmpfs     821M     0  821M   0% /run/user/0
 /dev/sdb       xfs        22G   34M   22G   1% /data
 /dev/sdc1      ext4       22G   47M   20G   1% /mnt/sdc
This indicates that the new partition /dev/sdc1 has been mounted to /mnt/sdc.
Configure Automatic Disk Partition Mounting at Boot
In Linux operating systems, you can configure the fstab file to automatically mount disk partitions when the cloud server starts.
This article describes how to use UUID in fstab to configure automatic mounting. The method of directly specifying a device name (e.g., /dev/sdb1) in /etc/fstab is not recommended because the device name may change during startup or server operations, and /dev/sdb1 could become /dev/sdb2.
Prerequisite: The data disk has been attached to the ECS instance.
Note: UUID (universally unique identifier) is a unique identifier string provided by the Linux system for disk partitions.
Procedure:
1.Log in to the Linux instance.
2.Run the blkid command to query the UUID of the disk partition. Taking partition /dev/sdc1 as an example:
blkid /dev/sdc1
/dev/sdc1: UUID="0b2060d2-1235-5abc-931d-ddb0b935****" TYPE="ext4"
This shows the UUID of /dev/sdc1.
3.Open the fstab file using the VI editor.
vi /etc/fstab
4.Press i to enter edit mode and add the following line.
UUID=UUID="0b2060d2-1235-5abc-931d-ddb0b935**** /mnt/sdc ext4 defaults, errors=remount-ro 0 2
The above content is for example only; refer to your actual situation. Parameter descriptions are as follows:
UUID:Enter the UUID of the disk partition queried in the previous step.
/mnt/sdc: The mount directory of the disk partition, which can be queried using the df -TH command.
ext4: The file system format of the disk partition, which can be queried using the df -TH command.
defaults,errors=remount-ro: The mount options for the disk partition; default settings are typically used.
0: The Linux dump backup option. 0 means not using Linux dump backup (commonly used now).
2: The fsck option, which checks whether to use fsck to check the disk at boot. 0 means no check. The root partition (mount point /) must be set to 1. Other partitions start from 2, and the system checks them in ascending order.
5.Press "ESC", then enter :wq and press "Enter" to save and exit the editor.
6.Run the umount command to unmount the partition.
Taking unmounting /dev/sdc1 as an example:
umount /dev/sdc1
7.Run the mount -a command to reload all content in the /etc/fstab file.
8.Run the mount | grep command to query the file system mount information.
Taking querying /dev/sdc1 as an example:
mount | grep /mnt/sdc
/dev/sdc1 on /mnt/sdc type ext4 (rw,relatime,errors=remount-ro,data=ordered)
This indicates that the automatic mount feature has taken effect.
Disable Automatic Disk Mounting at Boot
If you want to disable automatic disk partition mounting at boot, you can comment out the auto-mount command in the /etc/fstab file.
vim /etc/fstab
2.Run the following command to edit the /etc/fstab file.
# UUID=0b2060d2-1235-5abc-931d-ddb0b935**** /mnt/sdc ext4 defaults,errors=remount-ro 0 2
User Guide
This section primarily helps users understand how to manage disks in the console, including viewing basic disk information such as status, type, capacity, creation time, and billing type; performing basic disk operations; and viewing disk performance.
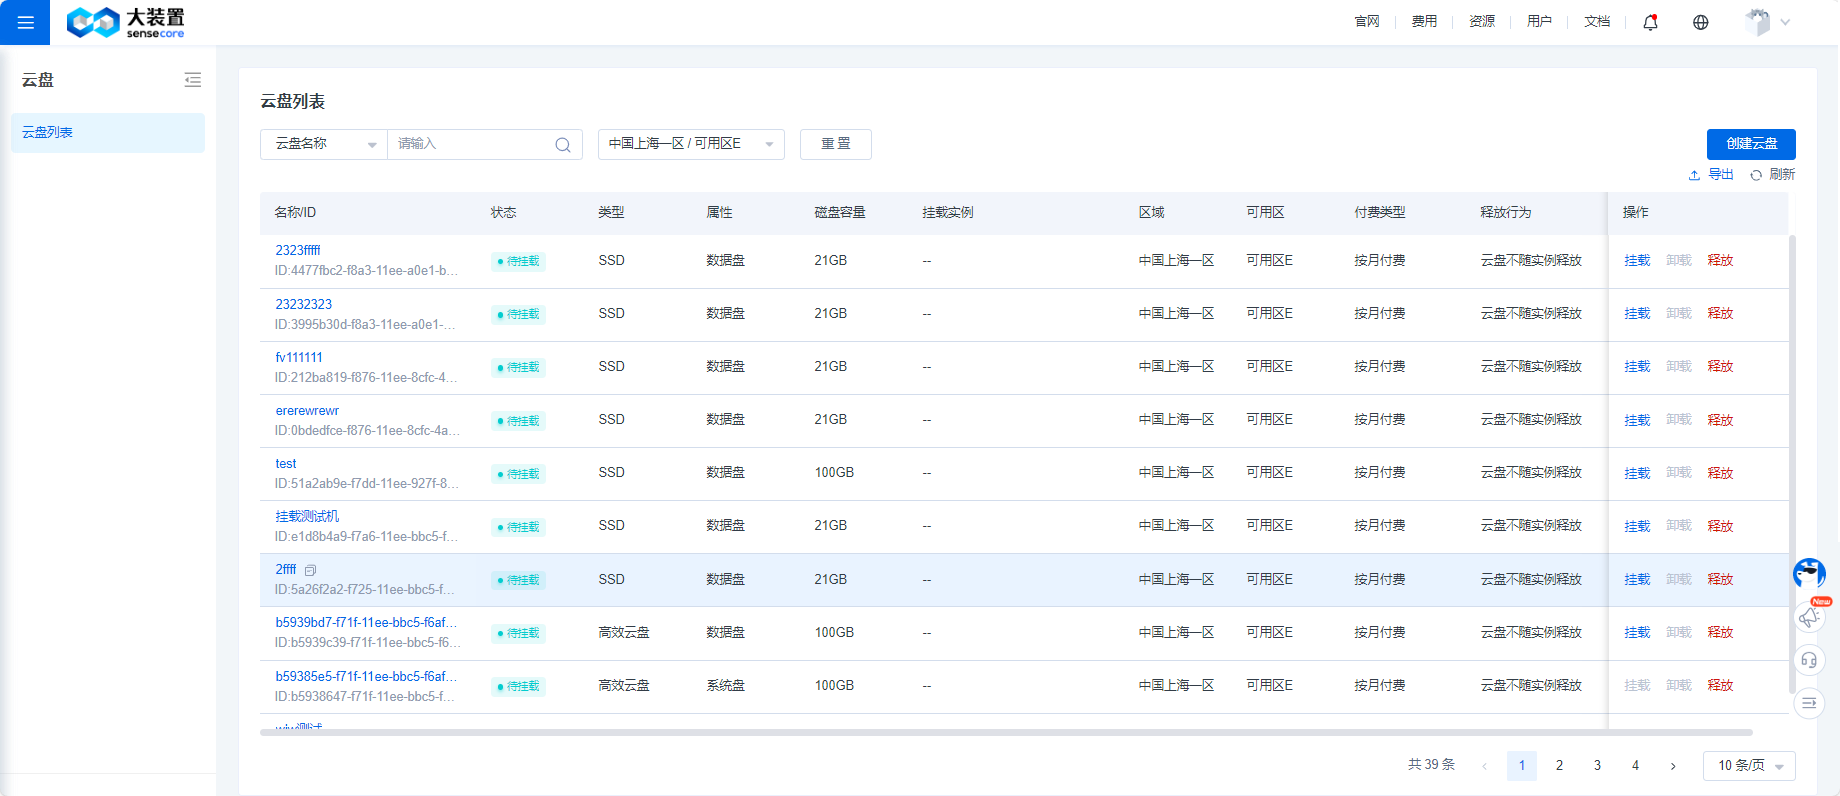
1.Disk List
On the Disk List page in the console, you can select different data centers to view all disks created by the user in the current data center. Basic disk information is displayed intuitively on this page. You can also filter disks by name, ID, or other criteria to view specific disks.
On the Disk List page, you can create disks and manage existing disks. Clicking a disk name/ID takes you to the disk details page to view detailed information and performance monitoring. Buttons in the operation column allow you to attach, detach, and release disks.
Disk List Display
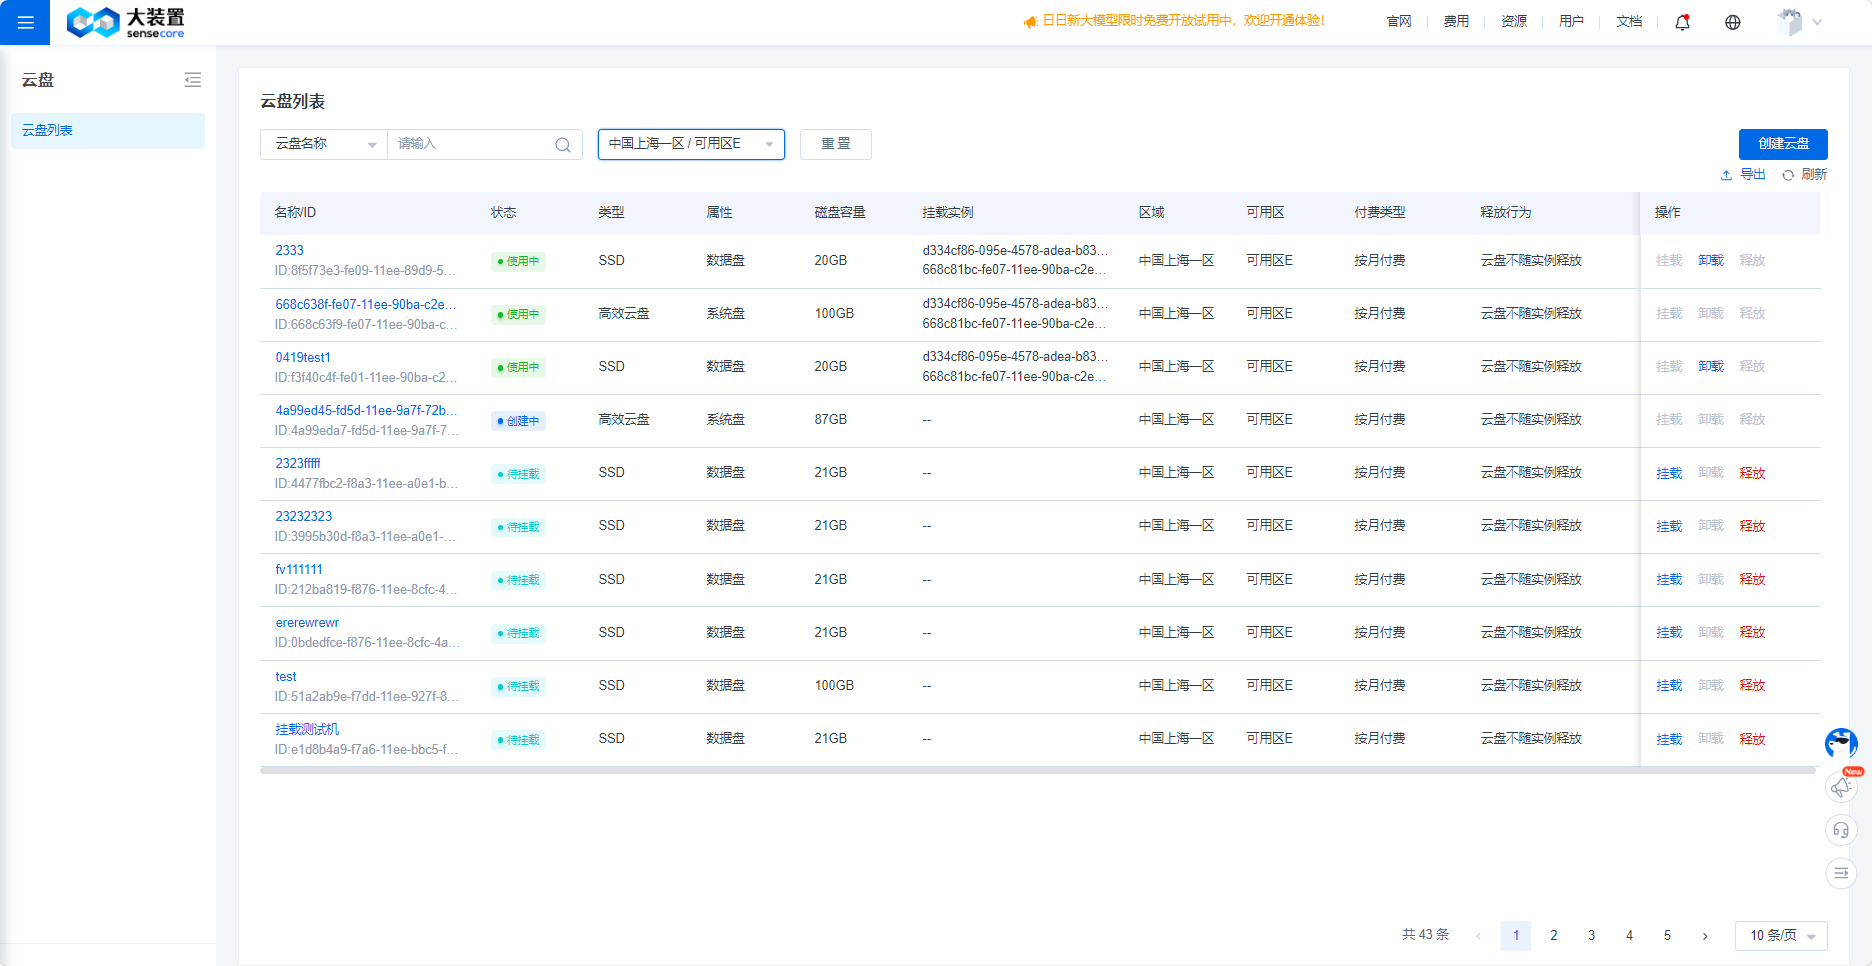
Clicking [Attach] attaches the current disk to an instance, providing scalable, highly available storage support for the instance.

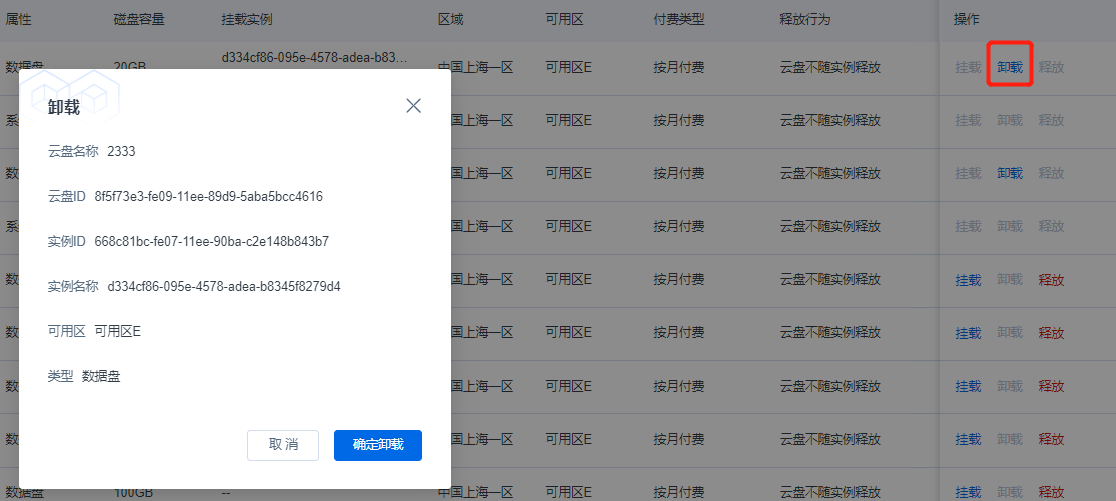
Clicking [Detach] detaches the currently attached disk from the instance, enabling disk release or attachment to another instance in the same region.
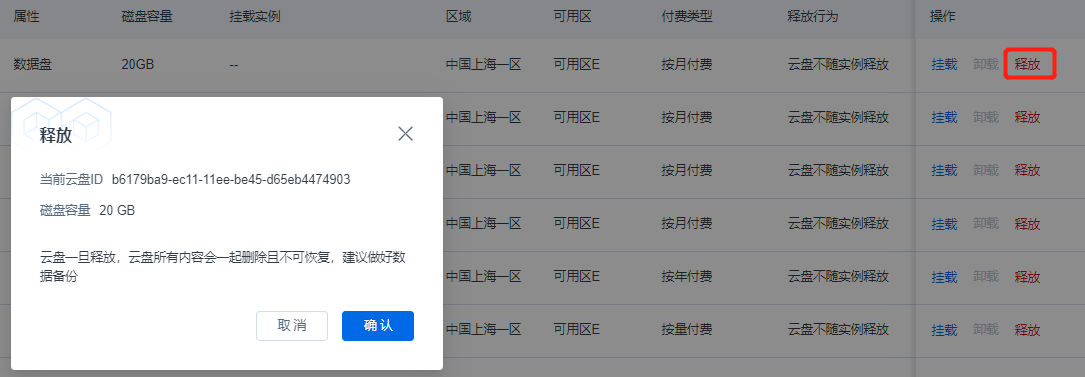
Clicking [Release] completely releases all data on the currently unattached disk, stops billing, and removes the disk from the disk list.
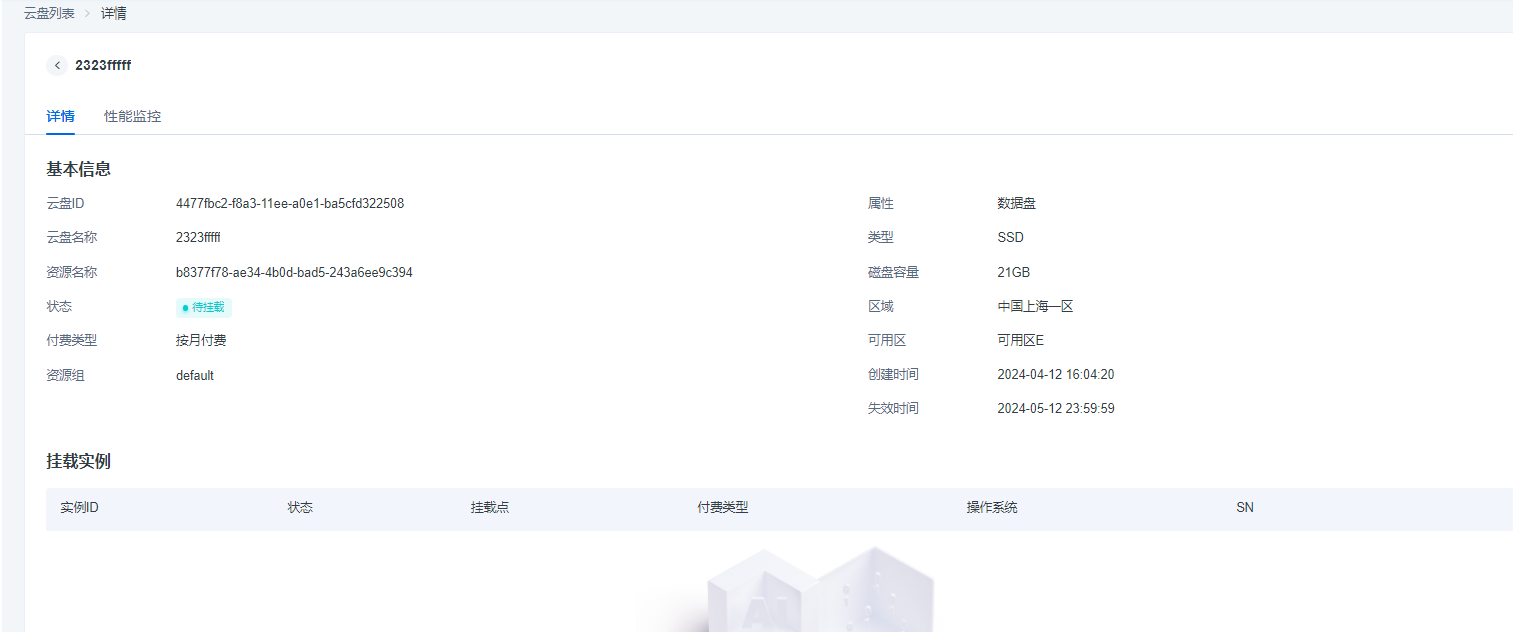
2.Disk Details
On the Disk List page in the console, select the target disk and click the disk name to go to the details page. The details page consists of two sections: Disk Details and Performance Monitoring, where users can view more detailed information about the disk.
Disk Details Display
Disk Details shows the disk's resource group, creation time, and detailed information about the attached instance.
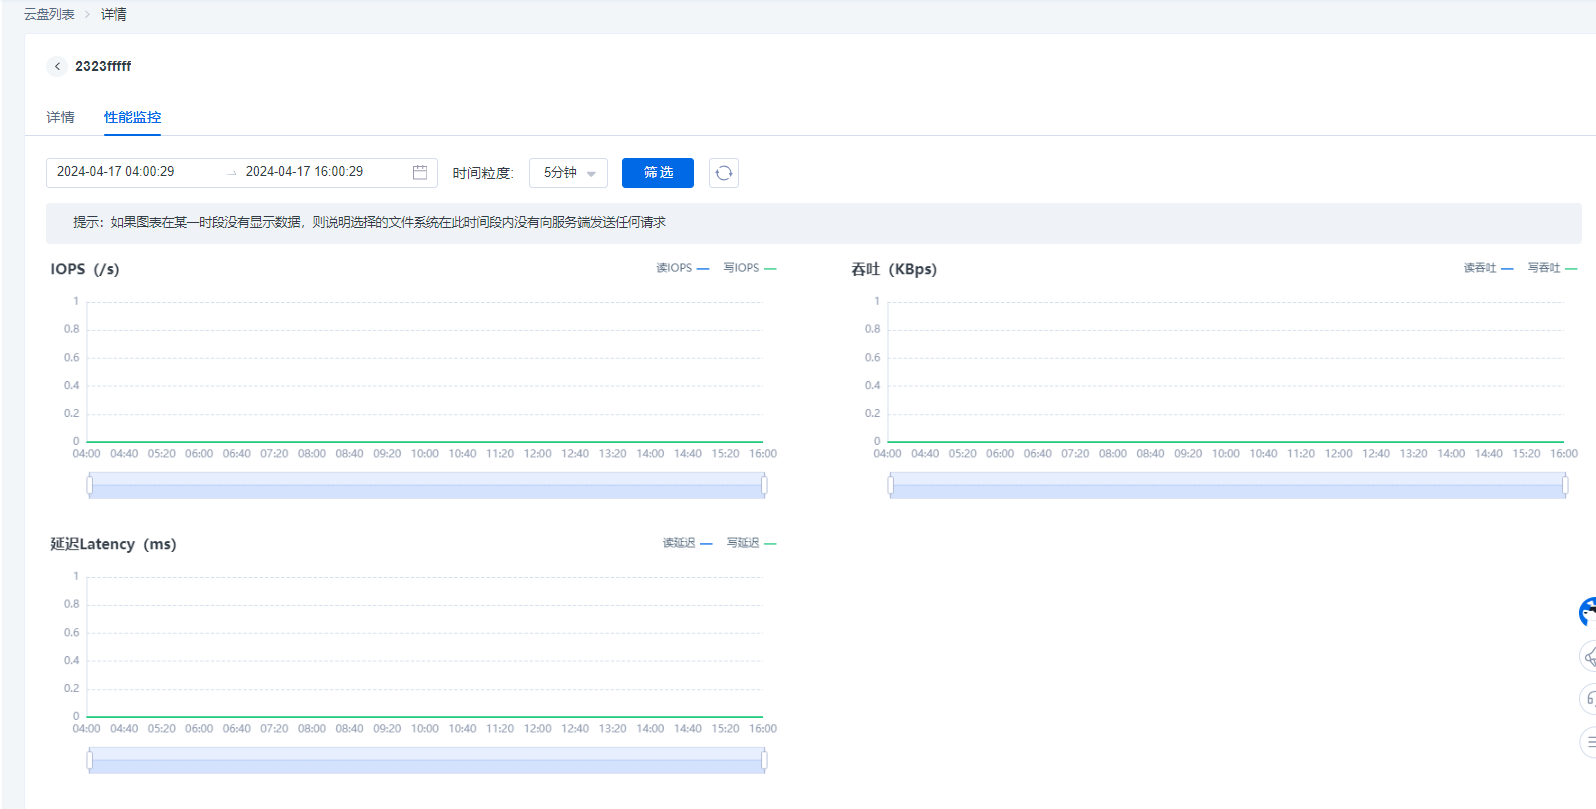
Performance Monitoring Display
Shows the disk's IOPS, throughput, and latency.
Frequently Asked Questions
1.What is Elastic Block Storage (EBS)?
Elastic Block Storage (EBS) is a low-latency, durable, highly reliable block-level random storage solution. It can serve as scalable storage for cloud servers and elastic container services, ensuring data security.
2.What is a disk? How many disks can be attached to one cloud server instance?
A disk is a block storage product provided for cloud servers or elastic container products. It is a distributed block storage solution with low latency, high performance, durability, and high reliability. One cloud server instance can have up to 1 system disk and 64 data disks attached.
3.What is the mount point of an instance?
The mount point is the location of the disk on the disk controller bus of the cloud server. The selected device name corresponds to the disk device number in Linux operating systems and the disk order in Disk Management in Windows operating systems.
4.Is there a limit on the number of disks?
There is no upper limit.